Georges on York DIY: How to Update a Thrift Store Find
One of the secrets to staying current at Georges on York Bed and Breakfast is making changes to design and décor in both large and small ways. After a recent Wilt Room upgrade – new headboard and bench, paint detailing, moving that shelf that was never in the right place – we realized that something was missing.
Each guest room at Georges on York has a laptop desk (a nod to our business travelers), and at least one chair. The Wilt Room had a couple of cushy chairs that were moved to Whispering Breeze Guest House when we found the perfect cushy bench to replace them. But…
That left the Wilt Room without a desk chair. Off to the Carroll County Habitat for Humanity ReStore for a project chair. We (really Sharon) have been looking for a new project and this chair upgrade was just the thing – a little chalk paint, a simple seat reupholstery – and done. A new chair for our guests and some craft time for the innkeeper. Win-win.
The (almost) perfect chair
There really is nothing like a stroll around the ReStore to get the creative juices flowing. We came home with two chairs – they were on sale 2 for $5! – so we bought a spare. Sharon chose the fancier chair as the best option for the room. The other one we bought is too modern for that Victorian-inspired space.
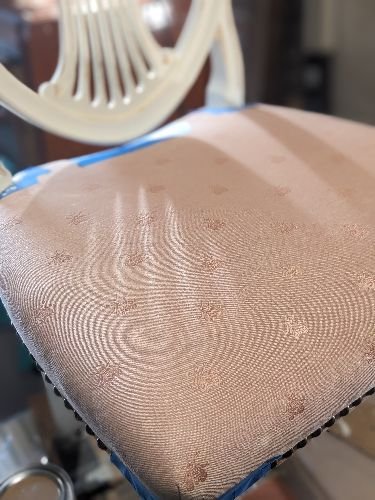
Harp-back, wheat sheaf detailing, walnut (probably), with graceful legs, and a pretty pink bee-embossed seat with nail head trim. The plan: chalk paint the wood to match the headboard and reupholster the seat with a coordinating fabric. Easy. Peasy. Wait, don’t we still have the gold accent paint we used on the dining room trim. Still easy.
We’ve done some simple reupholstery, so that won’t…be…a…Problem! The chair is old – not the modern type with a seat that unscrews from the frame. The nail head trim really sets off the seat, too. But it also makes recovering it out-of-the-question for Sharon. So now what? The pink fabric was nice, but not great, and it really didn’t go, you know.
It didn’t take long to come up with a solution. In fact, this was an opportunity to try something new. Sharon had been reading about it and looking for a chance to try it. Fabric paint. Upholstery painting. Totally changing the look of the seat by painting it the same color as the Wilt Room accent wall because it is the SAME PAINT! Mind blown. Creative juices flowing. Let’s get started!
The project
Here is a step-by-step guide to updating this lovely, worn thrift store dining room chair. The difficulty level of this project is easy to moderate. Sharon used latex paint for the seat cushion fabric, which has its own set of “rules.” Read on to learn more.
Patience. This project can’t be rushed. Each coat of paint needs to dry thoroughly before the next step.
Helpful Tip: Sharon painted the chair frame first, then the seat. You can paint the fabric first or wood. Not sure it makes a big difference in this case. Perhaps where there is more upholstery than wood, painting the fabric first makes more sense.
Step 1. Gather your supplies
Chair Frame:
· Wood cleaner or cleaning wipes
· Liquid Sander Deglosser (Klean-Strip™), gloves and paper towels
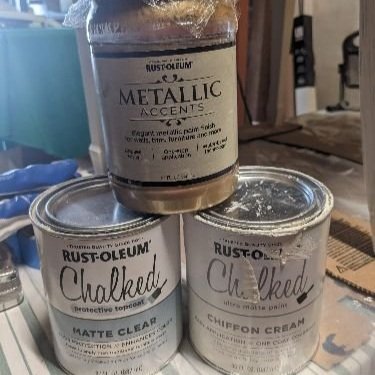
· Chalk paint (this project uses Rust-Oelum™ Chalked Ultra Matte in Chiffon Cream)
· Rust-Oleum Metallic Accents, Soft Gold
· Chalk Paint Sealer or Wax (this project uses Rust-Oelum Chalked Matte Clear sealer)
· Assorted brushes (natural bristles, 1-inch and detail; sponge brush for sealer)
· Painter’s tape
· 600 grit sandpaper
Fabric Seat:
· Vacuum, fabric cleaner, rags
· Latex paint (this project uses an eggshell finish latex paint in a dark plum)
· Fabric softener
· Water
· Nylon bristle brush (used in this project) or round-head brush
· Small spray bottle
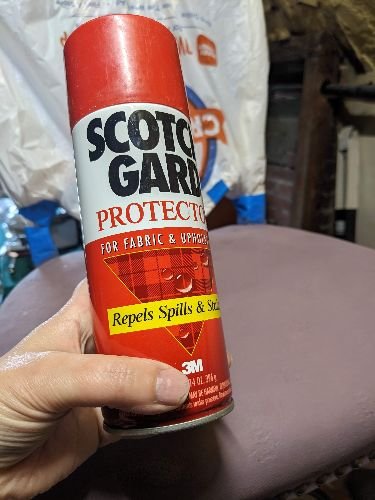
· Scotchgard ™ Fabric & Upholstery Protector spray
· Painter’s tape and plastic bag to cover chair back
· 1000 grit sandpaper
Step 2. Clean and prep the wood frame
· Wipe down the wood parts with wood cleaner or wipes. Make sure to get into the nooks and crannies.
· Tape off the seat to protect it where the wood frame and upholstery meet.
· Is the wood shiny, like it has a finish on it? Then either sand it or degloss it. Since we used Chalk Paint, sanding wasn’t necessary. But as an extra measure, deglossing the wood helps to deep clean it and ensure the paint will really adhere to the surface. Follow the directions on the bottle.
Step 3: Painting the wood frame
· Once the wood is dry, let the fun begin. Paint the wood frame using the 1-inch chip brush or your favorite paintbrush (Sharon loves a cheap chip brush!). It will take 2-3 coats.
· Let dry 2 to 24 hours between coats. Lightly sand between coats, getting rid of any lumps or drips.
Step 4: Decorative painting
· This particular chair really lent itself to some decorative, detail painting. Using a detail brush (Sharon used a ¼-inch wide artist’s brush), highlight areas of the chair with metallic paint, like the Soft Gold used on this project.
· Have fun with it. You can always paint over the areas you don’t like with Chalk Paint and try again or go back and do more.
This chair has beautiful wheat carving and fluting details, and just cried out to be given a little glitz. And it fits the room perfectly!
Step 5: Seal the paint
· Using the 1-inch chip brush or sponge brush, paint the sealer onto the chair. Sharon used the detail artist’s brush to get the sealer into the narrow spaces on the chair back.
· Let dry (2-24 hours) and check for missed spots, and if the chair will see a lot of use, add another coat of sealer. (If you are using another brand of chalk paint, seal the painted wood with your preferred sealer or wax.)
· Remove the painter’s tape from the chair seat.
Step 6: Prep the seat cushion fabric
· Tape off the wood chair frame where it meets the upholstered fabric. Sharon put a plastic bag over the chair back and secured it with tape.
· Vacuum the upholstery and clean with fabric cleaner. If you are using a light color paint, try to get any stains out of the fabric so they don’t bleed through. Wipe down and vacuum again if needed. (Basically, make sure it’s really clean.)
Let dry thoroughly before painting.
Step 7: Prep your paint
· Latex paint can’t be used directly on fabric as is. If used straight from the can it dries hard and crunchy, instead of soft and fabric-like.
· Sharon wanted to match the dark plum wall color in the Wilt Room, so after some online research (reading a bunch of DIY blogs about upholstery painting), decided to go the latex paint + fabric softener + water route. There is also a product called “fabric medium” that can be mixed with latex paint to make it act like a dye.
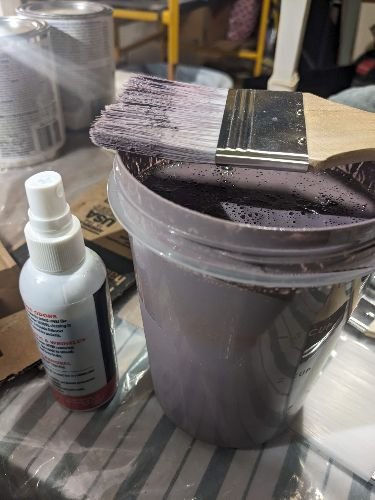
· 2:1:1 Mix 2 parts latex paint with 1 part fabric softener and 1 part water in a plastic container with a tight-fitting lid. Sharon used a quart container with a screw top lid, using 2 cups paint, 1 cup fabric softener and 1 cup water (made 4 cups of fabric paint). It made lots more paint than this project needed, but Sharon has plans for the leftover mixture.
· In the small spray bottle mix 1 part fabric softener and 1 part water, shake well.
Step 8: Fabric painting
· There are two schools of thought on wetting the fabric. Some say spray the fabric softener/water mixture onto the fabric in small sections then apply paint. Others say apply the paint and then spray in small sections. Sharon sprayed first, painted second. It wasn’t till after she found the “spray after” method but will try that on the next project.
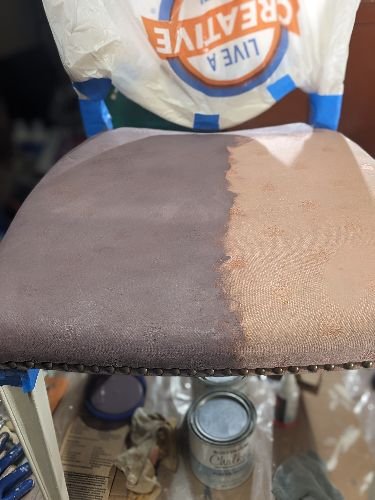
· Work in small sections. Spray the fabric so it’s damp. Using a nylon brush or round brush push the fabric paint mixture into the fabric. Continue until the entire seat cushion is covered. Multiple thin layers are better than a heavy layer. Patience, remember!
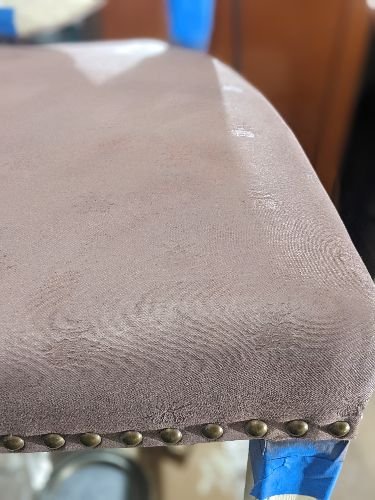
· Be sure to work the fabric paint into the corners and crevices, even where the fabric folds under the seat. And wipe off any stray paint mixture – like the nail heads on the project chair.
· Let the first layer dry completely (24 hours).
· Sand lightly, using the 1000 grit sandpaper (this is the real trick to getting the soft fabric feel). Wipe the dust off with a clean rag.
· Repeat wetting the fabric in sections and working the fabric paint mixture into the fabric.
· Let dry 24 hours. Very lightly sand any rough spots. Touch up as needed. Sharon applied two coats and liked the coverage and how the bee pattern came through.
· If you’d like a deeper finish, add one more coat – the theory on the water spray differs at this point. Most DIYers skip it at this point. Try a small section and see what you think. Let any touch ups dry completely.
Step 9: Fabric protection
· Now that the chair and fabric have been painted, it’s time to protect it.
· Sharon chose the Scotchgard method to seal and protect the new finish and ensure no color transfer. Lightly spray the seat cushion (wipe off overspray) and let it dry (check the product directions).
Spray another light coat again and wipe off any overspray. Let dry and enjoy!
That’s it! Our new Wilt Room side chair is ready for guests to enjoy and use. Check out the pictures and let us know if you have any questions about this project. We are excited to share our design and decorating tips with you. For more inspiration check out our guest rooms and guest house.
Georges on York B&B receives no compensation for the products used on this project.


